Showing posts with label Silhouette. Show all posts

Friday, August 5, 2011

Sock Monkey Birthday Party

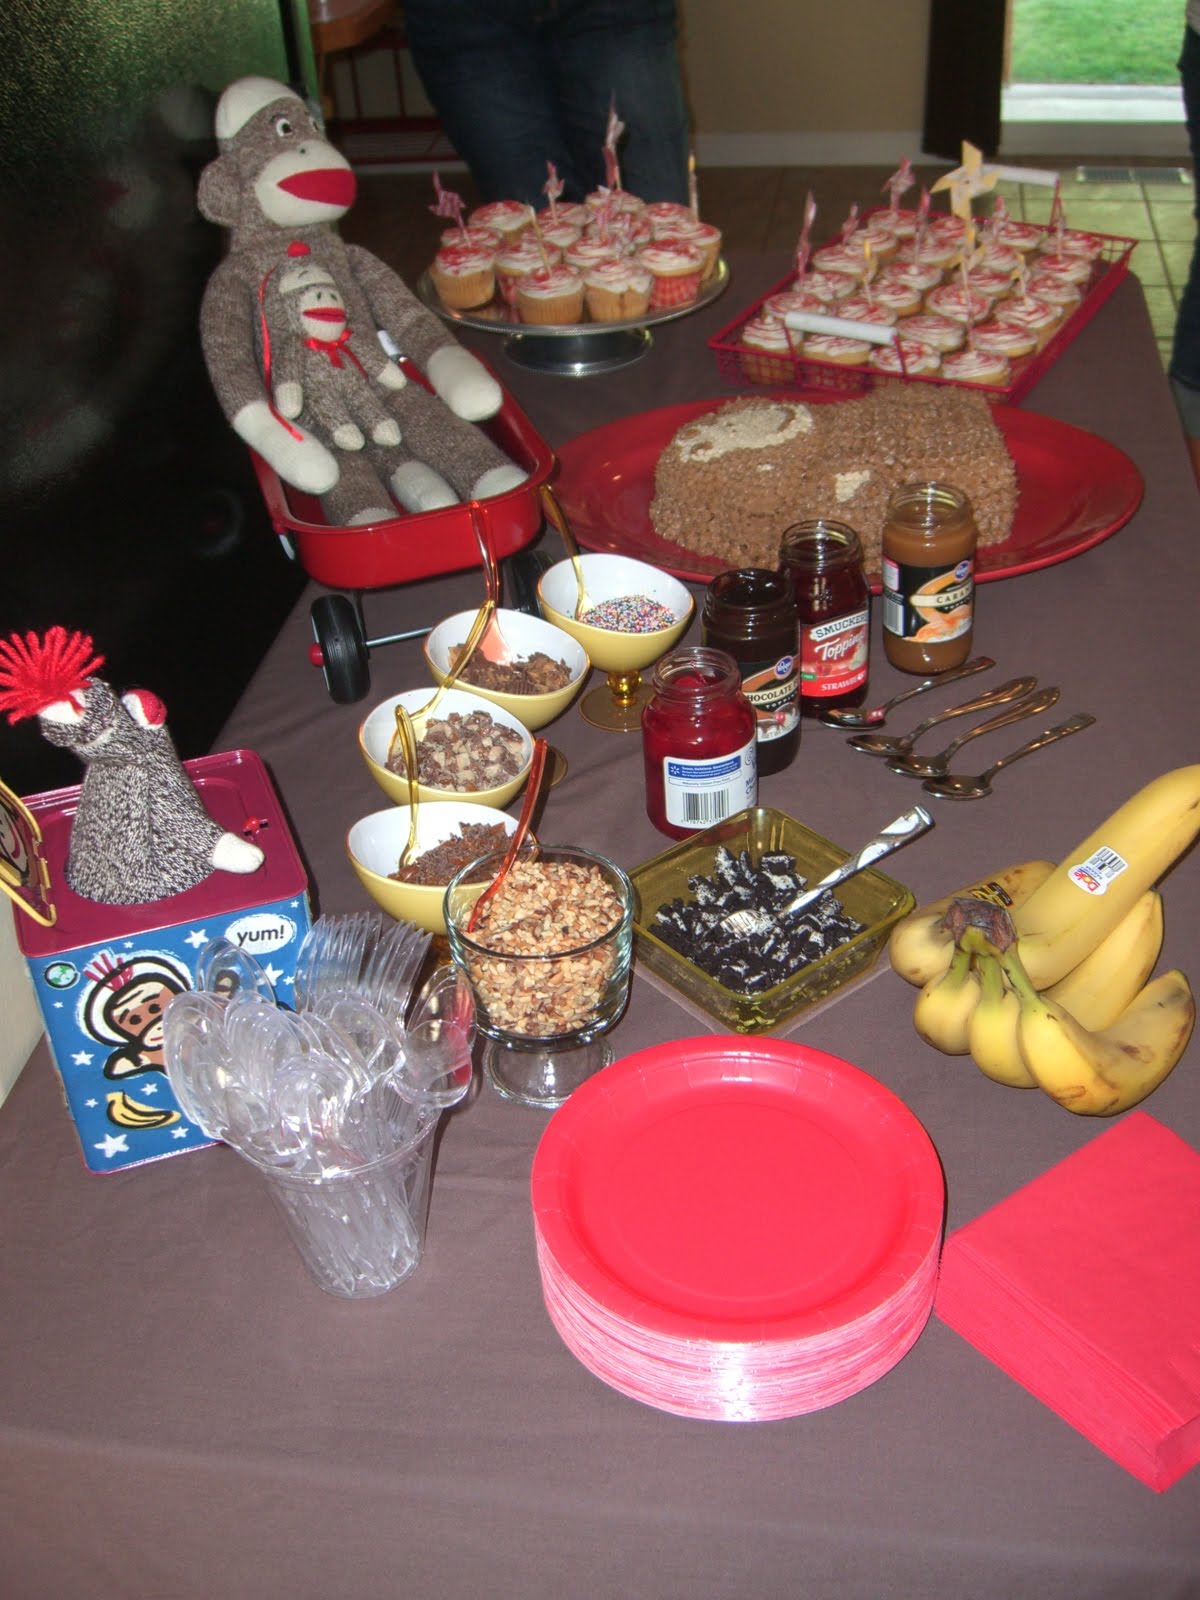
Baby B turned 1 on the 19th! It waa such a fun day! I'm finally getting to posting his birthday party... It was so much fun! I did it sock monkey themed.

I made cupcakes with red and yellow pinwheels. I did everything brown, tan, red and yellow.


His monkey cake. :) Fun but more time consuming than I thought it would be. It was still fun!


We ended up doing an ice cream bar instead of food. We invited all of our extended family so we figured it was easier.


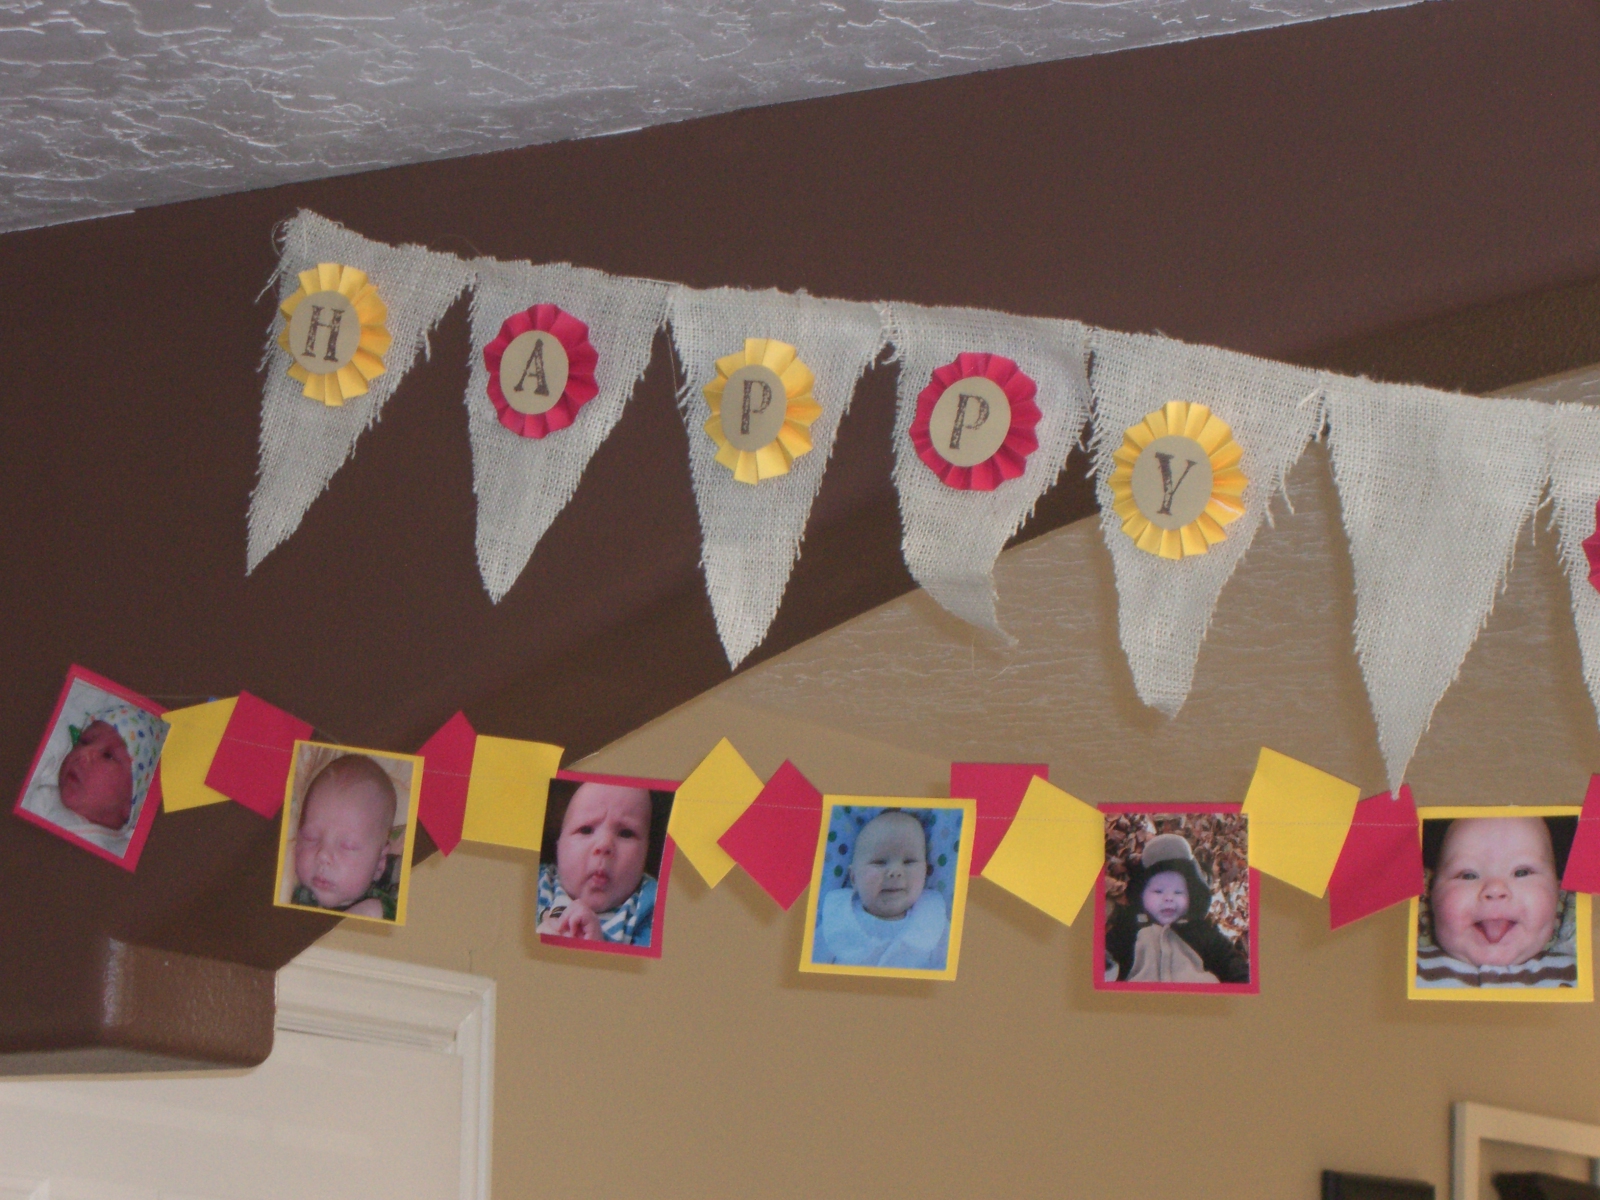
I made a burlap banner with "Happy Birthday" on it. I also did the banner underneath with a picture each month in the first year of his life. It was fun to look back at each month.


Had to have paper straws! :)


I made a little sock monkey shirt to go along with the theme. Can't see it too well I guess. I just cut it out on the silhouette and sewed it right on! :)


Not loving his birthday hat...


It was such a fun day! I can't believe he is already a year old!

Thursday, July 21, 2011

Porch Makeover. Well sorta....

I don't really have a porch necessarily.... But still wanted to find some way to make the entry into my house inviting and fun. I went to a few yard sales last weekend and found this planter and knew it was perfect. I had a hole under the tree that needed something and this worked perfect. So with new planter and the wreath I made for the door plus the house number on the door I feel like it looks a lot better.


Have a great day! I'm off to clean our camp trailer... :/ A camping trip this weekend and next!

Monday, July 18, 2011

Old window redo

My uncle had given me a few old window frames and I had been trying to decide what to do with them. One I ended up doing a family subway art with words all about our family(don't really know how to post it and show you where it has our address, town, first and last names etc. Maybe I'll post a list of what I did or something.) Anyways... The second one I decided to turn into a collage of Baby B's pictures. He is turning one tomorrow and it is so crazy how fast the last year has gone and how much he has grown. So I saw this quote- "In photos babies stay babies forever" and loved it. A few of my friends have also done things in their house with the same idea and quote. So here is the final project. Makes me realize how big Baby B has gotten!


Have a great day! :)

Wednesday, May 4, 2011

Hand scrub recipe!

As you know, we are moving this week. I am way excited for our new house but I am sad to leave our neighborhood friends. I wrote cards to all my friends, but for my best ward or neighborhood friends I made hand scrub! It was so fun and easy! It will be perfect for this time of year with everyone out in their yards and their hands getting rough.

The recipe is so simple....

1 cup sugar
1 cup olive oil (or any oil you prefer really)
1-2 drops of vitamin E oil (optional)
food coloring (optional) I used purple
1-2 drops of an essential oil (optional) I used lavendar essential oil

I mixed it up and poured it into small jars. It came together so quick!


I made a simple top using my silhouette sketch pens! Way quick and easy project! (I planned on spray painting the lids... Running out of time trying to move and go all out with crafts though. So today they will stay as they are...)


This also would be a great idea for a Mother's Day gift! :)

Tuesday, April 26, 2011

Easter weekend & Pillows

We had a great Easter at our house! It was extra fun where it was Baby B's first Easter. We went to church and then had family parties all afternoon. Made for a busy but great day!


He said he didn't like the "good egg" shirt his mom made for him. :) (saw the idea here)It was so quick with the Silhouette! Fun shirt and didn't take long at all.


Decided he would be a little happier now...


This was how the bunny turned out that I made for one of our family parties. I don't think it would have raised quite so much had I done the wheat bread like they said. :) It still turned out fun though!


So we are buying a new house and hopefully closing in the morning! Finally!! :) So with moving, I have decided to change up our room and been working on lots of projects for that. It is currently tan, brown and maroon. I now am changing it to grey, white, turquoise and a little bit of black. So in other words everything has to be changed because it's completly opposite colors!

I am working on a bed spread but thats for another post because it's not quite finished. :) But I have been doing pillows that are done! They both were easy and one very quick and the other a little more time consuming.

The first pillow was so simple!

First decide what size of pillow you want. Cut the fabric an inch bigger. Cut a one inch strip that is twice as long as you want. I put my first strip an inch from the edge of the fabric. Gather as you go and you get the ruffled look!


Super easy and quick. I think from start to finish this pillow took less than thirty minutes! I just enveloped my pillows so I could pull off the cover and change them again if I wanted or just to be able to wash them. (I don't know if everyone knows how to envelope but if not leave that in the comments and I can do a tutorial on that.)

The second pillow was a little more time consuming but still really easy. I got a bowl and a cup and that is what I got the pattern from. I traced them on a piece of paper and then cute them in half. I traced a million half circles on the back side of the fabric and once traced, cut them out. The outside layers are bigger half circles and the inside smaller.


After you have cut them out, you sew the circle part, but not the straight part. I should have taken more pictures along the way. Sorry! Put the good sides together so once it is sewn you turn it inside out and the good sides then will be out. Then iron them flat. Once ironed, you pin in a circle on fabric. After pinning, sew a big circle at the bottom of the circles so once the next layer is on the stitching will not show.


Keep going until you reach the center. Once I got closer to the center is when I switched and did the smaller half circles. There is no right or wrong to how many because each pillow will be a different size. For the center I just did a bigger and smaller circle to finish it off. I stitched through the back layer of the top circle to the back of the pillow top so that it would not show on the front.

Then you are finished! I am excited to finish our bed spread so I can start using the pillows!

Finished pillows-

Saturday, April 23, 2011

Sugared Popcorn and Easter cards

For our family, I make a card from Baby B each holiday. For easter this is what I did.


I used craft paint and made thumb prints on a piece of paper and made them into bunnies after they dried. (Trying to get thumb prints from a 9 month old is near impossible!) For the writing on the card, I used my Silhouette and used the Sketch Pens. It was so fun! The ears I just found at the dollar store. To go with it I decided to make some popcorn that in springy colors. I had a fun recipe for Sugared Popcorn in one of my recipe books and decided to try it out.

Sugared popcorn
1 stick butter (real butter)
2 cups sugar
1/2 cup water
1/2 tsp salt
food coloring
1 tsp flavoring (I did 1 tsp and it had tons of flavor, so if you dont want a lot then try less and taste to see if you want more.)

Bring all of the ingredients to a boil over medium heat and boil for 2 minutes. Remove and pour over popcorn. I used my air popper and did a cup of popcorn.(A cup before popped) If you are popping bags I think 2-3 would be about the right amount. Coat all of the popcorn and let cool. (I put my popcorn in a big bowl and coated it in there and then poured it on a cookie sheet to let it cool faster) This is a really quick and easy recipe!


I did pink and flavored it raspberry cheesecake and turquoise and flavored it tutti frutti. I think they turned out fun!


I think were about set for Easter now! off to get working on the bunny veggie tray.